Posts

How to Execute different programs in Linux - (C,C++,Java,Python,Perl,Bash,Ruby)

Image
       A Computer programming is defined as the process of designing and building an executable program for accomplishing a specific computing task. There are different types of programs to do this. We will be seeing how to execute them in a Linux machine.     An interpreter is the one that helps to execute a program. Every program has an individual interpreter. A program may be classified as, 1.Compiler Programs. 2.Direct Programs. Compiler Programs - Programs that uses compilers before executing C C++ Java Direct Programs - Programs that can be executed directly Python Perl Ruby Bash     As i said earlier in this article we will see how to execute different programs that will print "Testing Program for Linux!!!". Compiler Programs: C:     A C program has an extension .c , In C programs we need to compile the program before executing. For this we need gcc(GNU Compiler Collections) to be installed in our Linux machine.     Install gcc wit

Installing Docker-Compose on Ubuntu

Image
    On our previous article we saw how to install docker on Ubuntu 17.04. That is suitable for running a individual container(single applications). What if we want to run multi container application?     This leads to the invention of docker-compose, In this article, we will see you how to install the latest version of Docker Compose to help you to manage multi-container applications. Installing Docker Compose:     Run the below curl command which will download and install the latest version of docker-compose, jhony@ljunix~$ sudo curl -L https://github.com/docker/compose/releases/download/1.18.0/docker-compose-`uname -s`-`uname -m` -o /usr/local/bin/docker-compose Change the permission of the downloaded file which will make it as an executable one, jhony@ljunix~$ sudo chmod +x /usr/local/bin/docker-compose Check your installation:     Run the below command to check the version of docker-compose, jhony@ljunix~$ docker-compose --version docker-compose version 1.18

How to install Docker on Ubuntu-17.04

Image
        Docker is a great tool for automating the deployment of applications through containers. In this article we will see how to install docker on Ubuntu-17.04         Since Ubuntu-17.04 is not a LTS version, installing package on 17.04 is little burden. It requires apt-get update on adding repositories which will fails on dependencies. Docker is one of the too. We cannot install docker through apt-get on Ubuntu-17.04. Here is a workaround that will install and run docker on Ubuntu-17.04. Download the binary file from Docker official site through wget, jhony@ljunix~/Downloads$ wget https://get.docker.com/builds/Linux/x86_64/docker-17.04.0-ce.tgz Extract the file, jhony@ljunix~/Downloads$ tar -xzf docker-17.04.0-ce.tgz Copy the extracted files and folder to /usr/bin/ directory, jhony@ljunix~/Downloads$ cd docker/ jhony@ljunix~/Downloads/docker$ ls completion docker docker-containerd docker-containerd-ctr docker-containerd-shim dockerd docker-init docke

How to enable SSL on Apache web server - Httpd

Image
    On our previous article we have seen how to create a SSL certificate. If you have missed visit creating SSL Certificate         In this article we will be seeing how to install the SSL Certificate on our Apache web browser to secure our site.     In direct installation of httpd the modules should be configured seperately, the default installation allows your web server to run in 80(http) port. To enable https we need to install module and mention the certificate path on the conf.     After installing Apache web server through direct installation we need to follow up the below things to enable https, Installing SSL module for httpd: (mod_ssl)     mod_ssl is an Apache module that provides SSL v2/v3 and TLS support for the Apache HTTP Server. To install mod_ssl run the below command, $ yum install mod_ssl     The above command will install all necessary packages and files for enabling SSL on httpd. Configuring mod_ssl:     The location of SSL configurat

How to create a Self signed SSL Certificate

Image
    Have you ever verified that your site runs in a secured way. Here is a tip, If your sites runs in https then it is found to be secured if not then its time to enable https for your site using a SSL Certificate to keep it secure. Insecured: Secured: In this article we will see how to create a SSL Certificate that will help to keep our site secure. What is a SSL Certificate:     SSL stands for Secure Socket Layer. It enables an encrypted way of communication between browsers (Ex: Chrome, Firefox, Safari) and  web servers (Ex: Apache, Nginx, etc.,..). This helps us to secure personal information such as passwords, emails, credit card numbers etc..,. For acheving a secure connection an SSL Certificate is required. Functions of an SSL Certificate:     SSL Certificate authenticates the identity of the servers so the users may know that they are not sending their informations to the wrong server.     SSL Certificate encrypts the data that are being transmitted

Setting up a Mail server using Roundcube - Part-3 - Centos 7

Image
    The previous article shows how to configure Postfix and Dovecot for our mail server but we also need a web interface to access our mail server for handling the mail accounts. A mail client helps us to acquire this requirement, Roundcubemail .     Roundcube web mail is a PHP based application that integrate with SMTP and IMAP servers. This open-source mail client helps to handle the mail accounts on browsers.     Since Roundcubemail is a PHP based application the server should be a LAMP configured server. For LAMP installation, For Centos, Click here for RPM based machines. For Ubuntu, Click here for Debian based machines. Installing Roundcubemail,     Download the roundcube open-source package from their official site Roundcube.net $ wget https://github.com/roundcube/roundcubemail/releases/download/1.2.7/roundcubemail-1.2.7-complete.tar.gz Extract and rename the file, $ tar -xzf roundcubemail-1.2.7-complete.tar.gz $ mv roundcubemail-1.2.7 roundcu

Setting up a Mail server using Roundcube - Part-2 - Centos 7

Image
    On the previous article we have seen how to configure postfix configuration for a mail server. In this second part we will be seeing how to configure and integrate dovecot to handle mail box.     Dovecot is an open-source Internet Message Access Protocol (IMAP) and Post Office Protocol version 3 (POP3) server application. It retrieves emails from Postfix and delivers them to the relevant mailbox on the mail server.     The main config file is /etc/dovecot/dovecot.conf , all other related files are included in the main config file. To integrate IMAP with postfix we have already declared the parameters on /etc/postfix/main.cf files on the Part-I article , smtpd_sasl_auth_enable = yes smtpd_sasl_security_options = noanonymous smtpd_sasl_local_domain = $myhostname smtpd_recipient_restrictions = permit_sasl_authenticated,permit_mynetworks, reject_unauth_destination broken_sasl_auth_clients = yes smtpd_sasl_type = dovecot smtpd_sasl_path = private/auth Changes to be up

Setting up a Mail server using Roundcube - Part-1 - Centos 7

Image
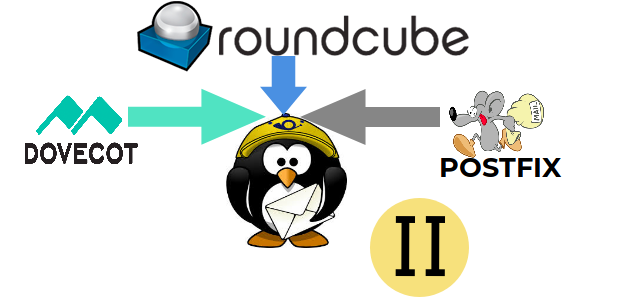
    Do you want to setup a dedicated mail server for your website, Our mail server depends on three major criteria, Postfix (SMTP) Dovecot (IMAP) Roundcube (Mail Client)     This article will show how to install and configure the above criteria for setting up a mail server for a domain. Postfix:     Postfix is a mail transfer agent (MTA) that delivers electronic mail across globe. It is also called as an SMTP server. Postifx can be integrated with spamfilters, dovecot and  complex SMTP-level access-policies     To install postfix in a rpm based machines run the below command, $ yum install postfix     The default path of the config files are found under this directory /etc/postfix.     The main.cf file is the core of your mail server configuration. The default main.cf file lists only a portion of the nearly 300 Postfix parameters. Most Postfix parameters do not need to be changed, but the flexibility is there when it’s required. The path for the main.cf f

Blog Top Sites

Blog Log